

Storm just rolled through and you’re wondering if your roof took a hit? This guide walks you step by step through how to check for hail damage on a roof safely, what real hail impacts look like on different materials, how to avoid common misreads (aging vs. hail), and what to do next. I’ll keep it plain, practical, and honest exactly how we explain it to homeowners at Rhino-vations.
What to Look For First (From the Ground)
Start here. Ground-level clues are fast, safer, and surprisingly accurate at indicating whether a roof merits a closer inspection.
Siding, Windows & Screens: Quick Tells
Take a slow lap around your home. Look for:
- Spatter marks on vinyl siding or painted trim fresh-looking clean spots where hail knocked off oxidation or dust.
- Torn or pitted window screens. Tiny punctures or fuzzy-looking abrasions often mean ice hit at speed.
- Chips on window beading and cracked glazing.
Field tip: When we arrive after a storm, we’ll often find a “hail side” of the house usually the windward elevation with the most scars. If one side shows obvious hits, the roof over it deserves attention.
Dents on Gutters & Downspouts
Soft metals tell the truth. Check:
- Top faces of gutters and downspouts for roundish dings the size of the hailstones (from pea to quarter size and beyond).
- Top faces of gutters and downspouts for roundish dings the size of the hailstones (from pea to quarter size and beyond).
If we see consistent dent patterns on gutters, we flag the adjacent roof slopes for closer inspection. In our experience, random one-off dents can be ladder or tool marks; a repeatable pattern is the red flag.
Outdoor Units (AC Fins, Grills, Mailbox)
- AC condenser fins: look for mashed or peppered areas.
- Grills, metal mailboxes, metal patio furniture: quick “truth meters.”
- Deck stain spatter: circular marks where ice knocked off dust or algae.
When Rhino-vations documents a property, we always photograph at least three soft-metal indicators before climbing. It helps build a consistent story for insurance later.
Confirm the Storm: Dates, Radar and Hail Size
Jot down date and approximate time, note the wind direction if you remember, and if available save neighborhood alerts. This context helps align what you see with what likely happened. We add this to a customer’s file because it shortens back-and-forth with adjusters.
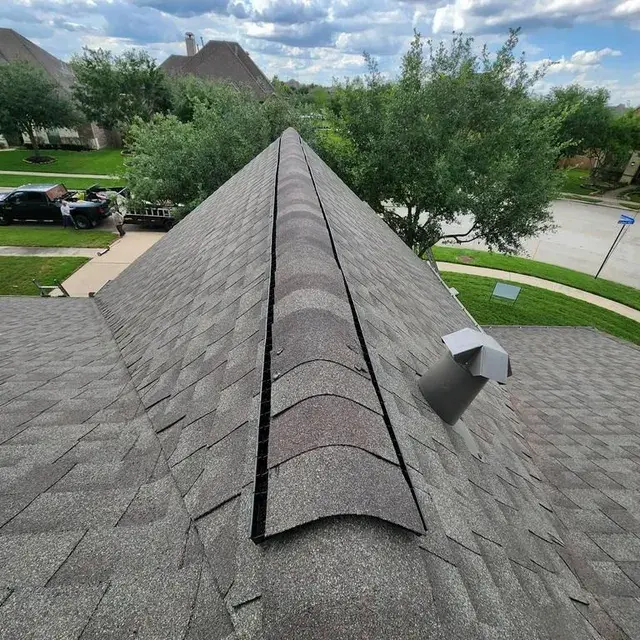
Roof-Level Signs by Material
When (and only when) it’s safe, a roof-level check reveals the true condition. If you’re unsure, stop here and call a pro falls aren’t worth it. Below is what real hail damage looks like on common roofing types.
Asphalt Shingles: Bruises, Granule Loss, Shiny Mat
Real hail impacts on asphalt/composition shingles typically show:
- Circular or irregular “bruises.” Press gently; a hail bruise often feels soft or spongy, like the flesh of a bruised apple.
- Granule displacement exposing dark, ashy substrate (“mat”). Fresh hits look clean and sharp; older hits gather dust and can darken.
- Edges with micro-cracks or crescent creases around the impact.
What’s not hail? Uniform granule loss in gutters (aging), algae streaks, blister pops (tiny volcano-like craters), and general brittleness on older shingles. In our inspections, we compare a suspect shingle to nearby “control” shingles under the same conditions; consistent, localized bruises are a strong hail signature.
Wood Shakes/Shingles: Sharp Splits, Orange/Brown Exposed Wood
On wood, hail tends to:
- Create sharp, fresh splits with a slightly orange or bright brown inner color where the wood is newly opened.
- Leave impact marks with crushed fibers or scalloped edges.
- Dislodge fragments along the face or butt ends.
Weathering, by contrast, rounds off fibers and fades the color. We note whether splits radiate from an impact point (hail) versus along the grain from natural shrink/swell cycles (aging).
Metal Roofing: Dings, Oil-Canning vs. Impact
Metal reveals:
- Roundish dings that catch light from an angle.
- Paint micro-fractures or coating scuffs at the center of a hit.
Beware oil-canning wavy distortion from expansion not a claimable hail issue. At Rhino-vations we sight along panels at a low angle and use a straightedge to differentiate real impact points from manufacturing or thermal movement.
Tile/Slate: Star Cracks, Chips, Displaced Pieces
Concrete/clay tile and slate show:
- Star or spider cracks radiating from a pinpoint.
- Edge chips or corner breaks where hail struck vulnerable points.
- Dislodged tiles or slipped clips.
We never walk tile without pads and layout knowledge; one wrong step can create damage that didn’t exist. If you’re unsure, stay off and document from a ladder at the eave with zoom photos.
Hail vs. Wear & Tear (and Other Look-Alikes)
This is where many DIY inspections go sideways. A few quick rules save a lot of confusion:
Aging: Blistering, Cracking, Algae
- Blistering: small popped bubbles with raised or ragged edges, often many per shingle caused by trapped volatiles or heat, not hail.
- Thermal cracking: straight lines or “craze” patterns across shingles.
- Algae/mildew streaks: dark streaks following water flow; cosmetic and common.
When we evaluate a roof for a customer, we record the age class (newer, mid-life, late-life) and match typical age defects. If aging is dominant, we say so plainly no scare tactics.
Manufacturing/Mechanical Defects
- High-nailing leads to lifted tabs and premature failure.
- Scuffs from installers’ boots or ladders look like smears, not circular impacts.
- Overdriven nails can create puckers that mimic damage.
We contrast suspect areas with “control” slopes and check fastener lines to isolate workmanship issues from storm damage.
Wind Damage vs. Hail Impacts
- Wind creases tabs along the sealant line, often in rows, and may tear tabs at corners.
- Hail leaves localized, circular bruises or dents.
Finding both is common after severe storms. We note each separately because coverage and remedies can differ.
Functional vs. Cosmetic Damage (and Why It Matters)
Insurers and contractors distinguish functional damage (roof performance is compromised) from cosmetic damage (appearance only).
- Functional: bruises that break the shingle mat, cracked tiles admitting water, metal punctures, or widespread granule loss exposing asphalt. These shorten roof life or allow leaks typically claim-worthy.
- Cosmetic: light scuffs or minor metal dings that don’t affect waterproofing. On metal roofs especially, small dents can be non-functional.
Insurers and contractors distinguish functional damage (roof performance is compromised) from cosmetic damage (appearance only).
DIY Safety & Documentation Checklist
Before you do anything, prioritize safety. Roofs and wet ladders don’t forgive mistakes.
Photos to Take (Angles, Scale, Lighting)
- Property context: four elevations, driveway, yard wide shots.
- Soft metals: gutters, downspouts, vents close-ups with a coin or tape measure for scale.
- Suspect shingle hits: 45° angle photos and straight-on; press gently to show bruising (don’t tear).
- Tiles/metal: low-angle rakes to catch dents or star cracks.
- Tiles/metal: low-angle rakes to catch dents or star cracks.
When we build an insurance photo set, we aim for 3–5 photos per slope showing a consistent pattern, plus overview and context shots. Consistency tells the story better than a handful of random close-ups.
What Not to Do
- Don’t climb on wet, icy, or steep roofs.
- Don’t chalk circles aggressively it can stain and look like created damage.
- Don’t apply sealant over unknown cracks; it can void warranties and complicate claims.
- Don’t remove shingles or tiles unless you know how they interlock.
If any of this feels risky, stop. We routinely complete no-obligation inspections with harnesses, anchors, and the right footwear so you don’t have to.
What to Do Next (Contractor, Estimate & Insurance)
When to Call a Local Roofer (and What They Should Check)
Bring in a contractor if:
- Ground indicators are positive (dented gutters, pitted screens).
- Neighbors report confirmed hail.
- You see bruises, star cracks, or metal dings on more than one slope.
A quality roofer should:
- Inspect every slope and all penetrations (vents, stacks, skylights).
- Check attic for fresh water marks.
- Provide a written report with photos, materials identified, and a clear functional vs. cosmetic assessment.
At Rhino-vations, we structure reports as “overview → slope-by-slope → recommendation” so adjusters can follow the logic quickly.
Pre-Claim Kit: Evidence for Your Agent/Adjuster
- Date/time of storm, any alerts, and neighborhood confirmations.
- 15–30 labeled photos (context + close-ups with scale).
- Contractor letter stating findings and whether damage is storm-related.
- Any repairs already needed to mitigate leaks (tarps, emergency dry-in).
We frequently join the adjuster meeting to identify slopes, show indicators, and keep the discussion on facts, not guesses.
Repair vs. Replacement: A Simple Decision Tree
- Is damage isolated to a few shingles/tiles? Spot repair may suffice.
- Is there a consistent pattern across slopes or functional impairment? Replacement is likely.
- Is the roof near end-of-life? Even moderate hail can tip it into replacement territory.
Our promise is simple: if repairs protect your home and your wallet, we’ll recommend repairs; if replacement is the durable fix, we’ll show you exactly why.
FAQs
Look for a pattern: pitted gutters/downspouts, torn window screens, dents on mailboxes/AC fins, and fresh spatter on siding. If two or more show up on the storm-side, the roof warrants inspection.
It depends on material, age, and wind speed. As a rough guide, asphalt shingles can show damage from about 1 inch hail with strong wind; wood, tile, and older shingles may mark with smaller stones. We’ve seen small hail do big damage on brittle, end-of-life shingles.
As soon as it’s safe. Fresh bruises are easiest to confirm in the first days while granule scuffs are still clean.
Policies vary. Many carriers focus on functional impairment. Get a roofer’s written opinion and talk to your agent.
You can’t stop weather, but impact-rated shingles (Class 3/4) and tight attic ventilation help roofs take a punch better. Regular maintenance cleared gutters, sealed flashings reduces leak risks after storms.
Conclusions
Checking for hail damage on a roof is about patterns, not one-off blemishes. Start from the ground, verify with soft metals, then confirm on the roof by material only if it’s safe. Separate hail from aging, document consistently, and decide based on whether the roof’s function is compromised. That’s exactly how we handle post-storm calls at Rhino-vations: methodical, transparent, and safety-first. If you’d like a professional set of eyes, we’re here to inspect, document, and guide you no pressure, just facts.